Freeview Multicast Streaming
I’ve spent some of this weekend setting up multicast streaming on my home network. The reason I’ve done this is because whilst our current bedroom has an aerial socket in it, we’re about to move to a bedroom which doesn’t. Whilst I could have run another cable from the attic to the new room (which has already been decorated), I thought it would be much more fun to try to enable a new network service – Multicast Streaming.
There are plenty of options for multicast streaming, VLC, dvblast, set-top-boxes, etc, I settled on using MUMUDVB. A very useful article has been written about doing just about what I wanted (but using dvblast) by TheAngryTechnican which has proven very useful for getting things up and running (kudos to him). I chose to use VLC as my client, mainly as I’m unaware of any other client which works so well with this setup.
For my setup, I’ve used an old Atom Mini-ITX box I had laying around. It’s quite old now, but still has its uses, and for streaming multicast, it’s actually proven to be overkill. The hardware is as follows –
- 1 x Atom ARK 330 1.6Ghz Quad-Core CPU
- 1 x 250GB Hitachi 2.5″ SATA HD
- 1 x 1GB Memory
- 2 x WinTV Nova-T USB DVB-T Receivers
- 1 x WinTV Nova-T 500 PCI Dual DVB-T Receiver
The Atom has a built-in Realtek 8168 Gigabit Ethernet card on it so for the purposes of multicast, this is more than adequate. There’s only one PCI slot available on the device, hence why I used USB receivers to fulfil my requirements for the transponder frequencies I needed.
I’d chosen to use Debian as my OS of choice for two reasons; It’s the Linux OS I’m used to using, and it has the mumudvb package included as part of it’s apt-sources. To install, simply run –
apt-get install mumudvb
For the WinTV Nova-T USB and PCI receivers, I had to download the firmware necessary for this card from LinuxTV and place it in my /lib/firmware directory in order to get the cards loaded correctly by the Debian OS when it booted –
DVB: registering adapter 0 frontend 0 (DiBcom 7000PC)...
DiB0070: successfully identified
DVB: registering adapter 1 frontend 0 (DiBcom 7000PC)...
DiB0070: successfully identified
DVB: registering adapter 2 frontend 0 (DiBcom 3000MC/P)...
MT2060: successfully identified (IF1 = 1246)
DVB: registering adapter 3 frontend 0 (DiBcom 3000MC/P)...
MT2060: successfully identified (IF1 = 1237)
Once the firmware was loaded following a reboot, we need to configure mumudvb.
The frequency information is available all over the place on the Interweb, some of it confusing, however here are the ones you need if you want all Freeview channels from the Mendip Transmitter.
690
698
722
738
754
You’ll note there’s five frequencies there, which means I don’t have enough DVB-T cards in my setup (each card card only lock on to one frequency at a time). Thats fine, I’ve left out 722 for now. I might get another USB DVB-T in the future, but the only channel I’m interested in on that frequency is Yesterday and I can live without that for now.
As there are several transponder frequencies needed to get the Freeview channels I need, I created four configuration files, each almost identical, except for the frequency and a couple of other items.
Mumudvb comes with the option to auto configure everything for you (autoconfiguration=full). I used that option in my configuration files, however I needed to specify some additional options to get things working with all four DVB-T cards at the same time.
All four configuration files had the following identical settings –
timeout_no_diff=100
dvr_thread
rewrite_pat=1
rtp_header=1
check_status=1
pol=h
srate=27500
autoconfiguration=full
autoconf_radios=1
autoconf_pid_update=0
autoconf_ip4_header=239.10
multicast_ttl=2
multicast_auto_join=1
unicast=1
ip_http=172.16.129.253
sap=1
sap_default_group=MCAST
The only differences added in each file were as follows –
Transponder frequency 690
card=3
freq=690
port_http=80
Transponder frequency 698
card=0
freq=698
port_http=81
Transponder frequency 738
card=2
freq=738
port_http=82
Transponder frequency 754
card=1
freq=754
port_http=83
The ‘port_http’ parameter in each of the individual frequencies above specifies a web service with provides a ‘playlist.m3u’ file which you can use for clients that aren’t able to receive multicast SAP announcements. In the identical section, you define the IP address hosting those web services using the ‘ip_http’ parameter. You can download each of these files, and open them within VLC as Playlists then save a ‘master’ playlist for use later. Clients accessing these Playlists do so using Unicast.
After all of the above is done, you should end up with four (in my case at least) configuration files, one for each frequency. Here’s an example of one of my files (for frequency 690) –
card=3
freq=690
timeout_no_diff=100
dvr_thread
rewrite_pat=1
rtp_header=1
check_status=1
pol=h
srate=27500
autoconfiguration=full
autoconf_radios=1
autoconf_pid_update=0
autoconf_ip4_header=239.10
multicast_ttl=2
multicast_auto_join=1
unicast=1
ip_http=172.16.129.253
port_http=82
sap=1
sap_default_group=MCAST
With the configuration files written, I started four separate mumudvb processes, calling each configuration file with each process with a simple script created in /usr/bin (I ran ‘chmod +x /usr/bin/mumustart.sh‘ to make it executable).
#!/bin/sh
mkdir /var/run/mumudvb
/usr/bin/mumudvb -c /etc/mumuf690.conf &
/usr/bin/mumudvb -c /etc/mumuf698.conf &
/usr/bin/mumudvb -c /etc/mumuf754.conf &
/usr/bin/mumudvb -c /etc/mumuf738.conf &
exit 0
Mumudvb comes with it’s own init script under Debian, but I was never able to figure out why I got the following error when I started it. I might report back if I ever find out.
ERRO: DVB: FRONTEND DEVICE: /dev/dvb/adapter1/frontend0 : Permission denied
Also, on reboot, the /var/run/mumudvb directory seemed to be deleted so I got the following error too.
WARN: Logs: saving_filename /var/run/mumudvb/mumudvb_generated_conf_card0_tuner0: Permission denied
So, the ‘mumustart.sh’ script, created in /usr/bin got around those errors. The script is invoked at startup in /etc/rc.local, as follows –
#!/bin/sh -e
#
# rc.local
#
# This script is executed at the end of each multiuser runlevel.
# Make sure that the script will "exit 0" on success or any other
# value on error.
#
# In order to enable or disable this script just change the execution
# bits.
#
# By default this script does nothing.
/usr/bin/mumustart.sh
exit 0
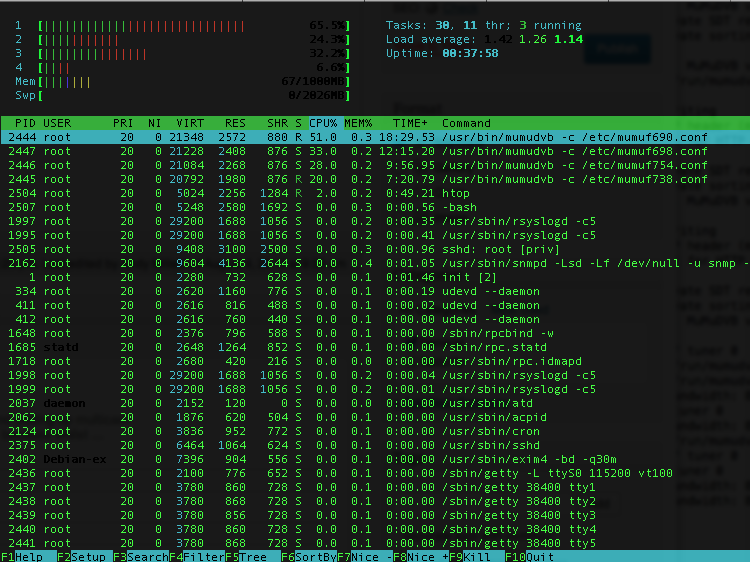
With all four processes running, mumudvb isn’t that demanding in relation to CPU, and barely at all in relation to memory.
The difference between standalone dvblast and mumudvb is that mumudvb handles the creation of the SAP streams for you. Like so –
Channel number : 0, name : "BBC ONE" service id 4161
#011Multicast4 ip : 239.10.0.0:1234
#011Unicast : Channel accessible via the master connection, 172.16.129.253:80
Channel number : 1, name : "BBC TWO" service id 4287
#011Multicast4 ip : 239.10.0.1:1234
#011Unicast : Channel accessible via the master connection, 172.16.129.253:80
Channel number : 2, name : "BBC THREE" service id 4288
#011Multicast4 ip : 239.10.0.2:1234
#011Unicast : Channel accessible via the master connection, 172.16.129.253:80
Channel number : 3, name : "BBC NEWS" service id 4352
#011Multicast4 ip : 239.10.0.3:1234
#011Unicast : Channel accessible via the master connection, 172.16.129.253:80
Channel number : 4, name : "BBC Red Button" service id 4416
#011Multicast4 ip : 239.10.0.4:1234
#011Unicast : Channel accessible via the master connection, 172.16.129.253:80
Channel number : 5, name : "BBC FOUR" service id 4544
#011Multicast4 ip : 239.10.0.5:1234
#011Unicast : Channel accessible via the master connection, 172.16.129.253:80
Channel number : 6, name : "CBBC Channel" service id 4608
#011Multicast4 ip : 239.10.0.6:1234
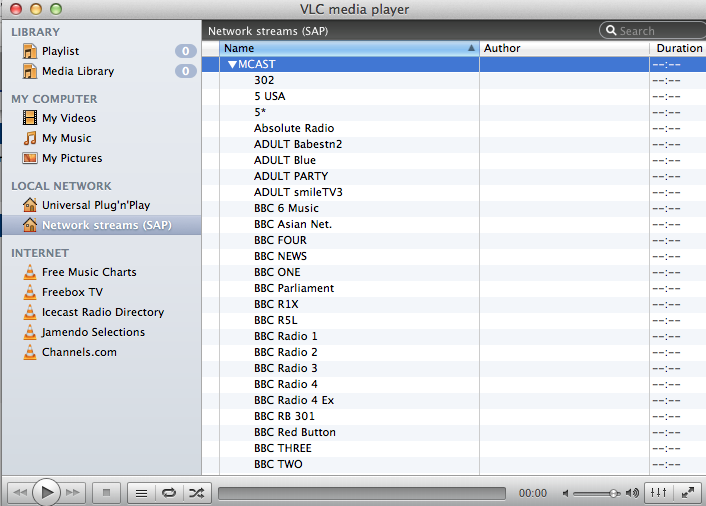
So now you have things running, you can fire up VLC and navigate to the Local Network / SAP Streams section.
Choose a channel from the SAP listing, and ‘Voila’!
For those clients which can’t use SAP announced channels, you can use plain old unicast streaming using the links which are created by mumudvb with the port_http and ip_http options in the configuration files.
For this, you simply download the M3U playlist from each server process port, and add it to VLC. For example –
http://172.16.129.253/playlist.m3u
http://172.16.129.253:81/playlist.m3u
http://172.16.129.253:82/playlist.m3u
http://172.16.129.253:83/playlist.m3u
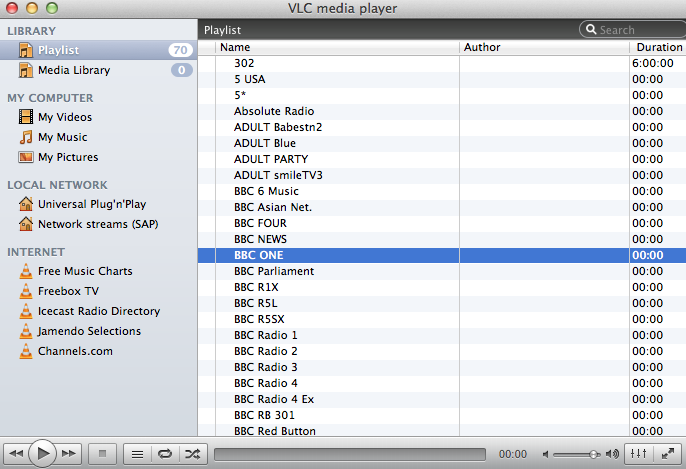
Once you’ve downloaded the files, add them to VLC, then save a local M3U master playlist which you can open later. Like so –
If you wanted to be selective about the channels you announce via SAP, I urge you to look at The AngryTechnican blog where you can do the above using dvblast, and minisapserver.
One of the things I’ve noticed is that some of the channels available over Unicast don’t seem to have been announced by the SAP server. BBC R5SX, for example, doesn’t appear in the SAP list. When I figure out why this might be, I’ll report back.
DISCLAIMER
To do any of the above if you live in the UK, you MUST have a TV License


